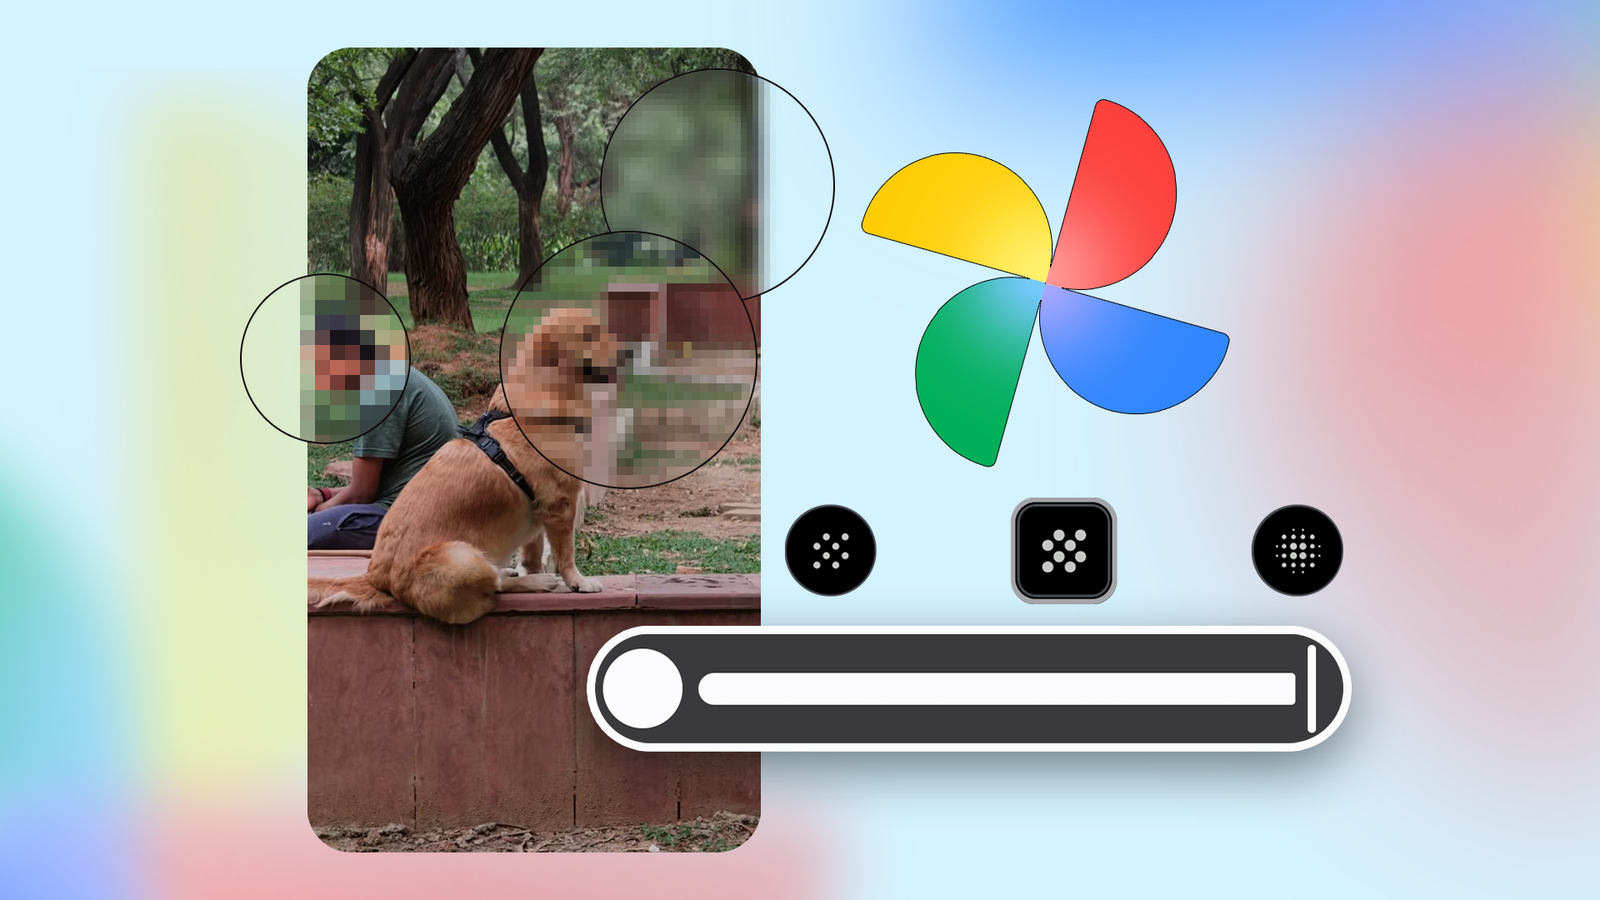
It seems like Google has finally woken up and has added a feature to that I've been using for almost half a decade on my OnePlus 9 Pro.
Google Photos has rolled out a new Markup tool that lets you blur or pixelate sensitive details in images.
While OEM phone companies have offered the feature for a while, Google Photos has finally caught up.
Why Google Photos' redact tool matters for everyday users
A neat feature that we always wanted

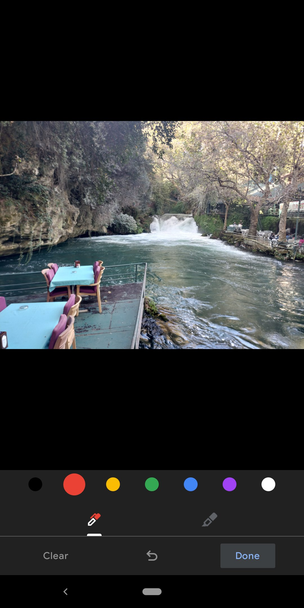
The new redact tool in Google Photos is one of the most useful features I've used on my OnePlus 9 Pro.
Now that the feature is rolling out to Google Photos, every device I own, including my Xiaomi Pad 7, can take advantage of it.
The redact Markup tool for Google Photos is currently rolling out only on Android. There's no confirmed timeline for iOS devices.
The feature is a great tool for hiding sensitive material from screenshots and images before you share them with someone else.
When I'm testing new phones, I miss this feature and often have to rely on third-party apps to do the deed if a redaction tool isn't supported natively.
This is especially true for Pixel devices since the Google Photos app is also the default gallery app.
Without a third-party app, I would have to use the markup tool and scribble over the sensitive information.
But now that the feature has rolled out to Google Photos, it makes my life easy.
If you're wondering why this little feature matters, think of all the times you shared screenshots from banking apps, boarding passes, or pictures of cars or homes.
You will end up showing personal data like your car's registration number, address, or banking details to strangers who can take advantage of it.
With the new redact tool in Google Photos, I don't have to worry about this issue anymore.
Now that this feature is available for all Android phones, I've stopped relying on third-party apps. It freed up storage space on my phone and is intuitive to use.
I have to say, the redact tool feels much more polished than some of the apps I've used.
I use it most when I share pictures on Instagram stories that feature my infant. I want to share those memories with my friends, but I also don't want to share face images with social media companies.
How to use Google Maps' redact Markup tool to hide sensitive information
It's quite straightforward, really


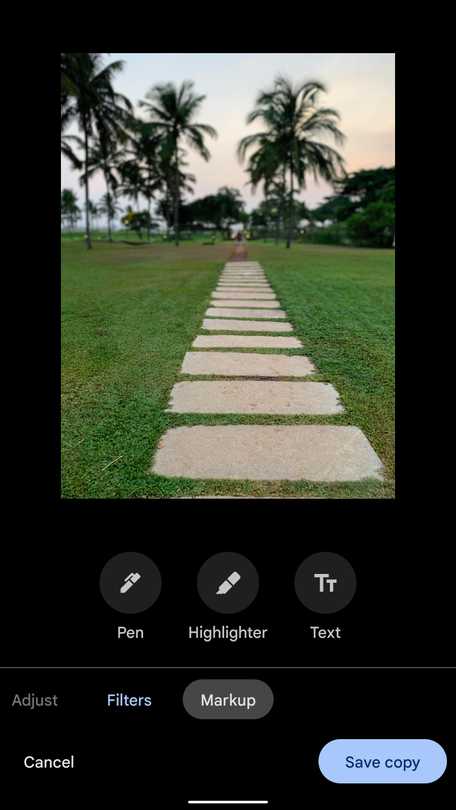
If you've used the Markup feature in Google Photos before, you will feel right at home. The feature works on all images, including those in your library.
This new feature is available next to the Pen icon you used for scribbling earlier. It works much like OnePlus' Redact feature.
If you're wondering where you can find this feature, follow the steps below:
- Open and select the photo or screenshot you want to edit.
- Tap the toggle found at the bottom.
- Select the option.
- Tap the Redact pen icon.
- Choose your preferred style (Mosaic/Mosaic Light/Blur) and adjust the thickness according to the image.
- Slide your finger over the sensitive areas that you want to redact.
- Tap the to apply.
- Choose Save as copy (recommended) to preserve the original image in Google Photos.
- Share the redacted version.
You can choose from three redaction styles: blur, mosaic light, and mosaic. The blur style applies a Gaussian blur to the area you tapped.
I don't have empirical proof, but I've always preferred this style. The redaction tool also has a thickness slider that lets you control the brush size.
This is the most useful tool, as you can adjust your redaction size according to the image you’re editing in Google Photos.
For example, when redacting a face, I use a thicker brush because it is faster, whereas when redacting text, I fine-tune the brush size so that other important text in the image stays visible.
It depends on the surface area you are redacting, and I suggest using the thickness tool each time.
Don't fret over this too much. You can undo or redo the redaction if you aren't happy with the result or made a mistake.
If you don't see the redact pen icon, the rollout hasn't triggered for your account since it is still ongoing. Make sure Google Photos is up to date via the Play Store.
When the feature is available in Google Photos, I recommend testing it with an older image to get the hang of it. I also recommend saving the image with redactions as a copy so that you still have access to the original.
Why Google Photos' redact markup tool is essential
Even though was late to the party, letting users blur and redact sensitive information from images is still crucial.
We no longer have to rely on third-party apps that might track or collect telemetry to hide sensitive information.
It's the most meaningful update to Google Photos in years, and it's never too late when it comes to preserving privacy.